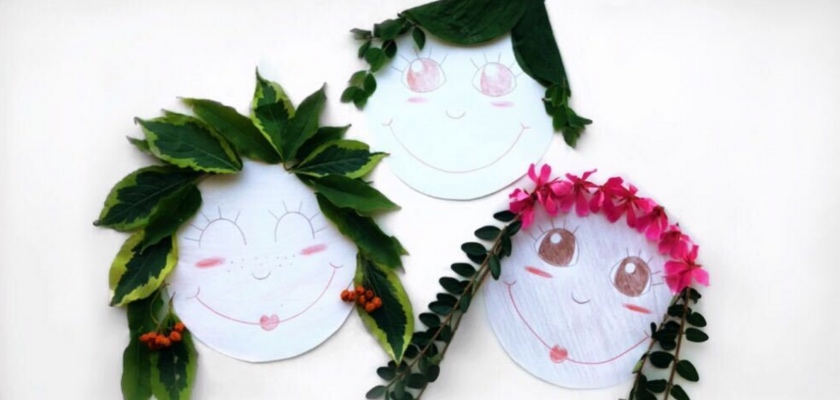
Kids leaf arts and crafts
Get creative with this unique, leaf and flower arts and crafts activity for kids! Use leaves and flowers to create a diy hairstyle makeover.
Leaf art, diy hairstyle with kids | Step by Step
Doing arts and crafts with kids is one of the greatest things that there is. So, grab your crafting materials and get ready, because we have another fun, nature-focused diy activity!
Have you always wanted to have a different hairstyle? Then give yourself a makeover with this DIY and create a beautiful hairstyle with leaves and flowers. There is nothing better than making diys with leaves and this arts and crafts activity is perfect for a rainy day and for creative kids!
What you need;
- White or colored paper
- Pencils, crayons or markers
- Scissors
- Leaves and flowers
- Glue
1. Draw yourself and/or your friends
Who do you want to give a new haircut to first? Do you want to give your friends a new hairstyle, or do you want to make your own new hairstyle? No matter who you choose, the first step is to draw a face. You can do this on a sheet of paper. First, make a big, round circle and draw the facial features of the person in this circle. Pay attention to what color eyes they have, if they have freckles, and don’t forget to draw a beautiful smile! Once you’ve drawn the face, you can go ahead and cut the face out with a pair of scissors.
Tip: Use a pot as an outline for the head. This way, you can easily make a perfectly round head for the face.
Tip: Parents or babysitters should oversee or help with cutting out the face. Using scissors can be unsafe for young children.

2. Do something crazy with that hair!
It’s finally time for the hair! Long hair, short hair, wild hair, you can make it as crazy or as beautiful as you want! Grab your leaves and flowers and give the face you drew a beautiful new hairstyle.

Lay the cut out face on a new piece of paper. This can be a white piece of paper or any other color for some contrast! Place the leaves and flowers around the face until you’re totally satisfied with the new hairstyle you created!

3. Time for accessories
But, what is a haircut without some sweet accessories! Do you always wear a hairband, a hat, or some cute earrings? Add these to your leaf art project! Here you can make sure that the makeover is a complete success!

And, are you satisfied with your makeover? Then it’s time to glue the face, leaves, and flowers to the new piece of paper. And voila! You’ve finished your first leaf and flower hairstyle diy! You can make as many more as you’d like! For example, we made three for your inspiration.

Did you love this DIY too? Then check out our other fun diys for kids! Want to share your beautiful DIYs with us? We’d love to see them! Tag us @babysits on Instagram or Facebook.


